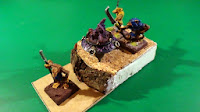
And another WIP for my Cauldron of Blood today. At the moment I am trying to build me a base for the Cauldron. Since it should be a bit more scenic I thought of a small "hill" where the cauldron stands, two witches behind it and the standard bearer in front of it.
Since I have lots of bark in my box I used some of it to get a rough layout (which will be painted like rock). Too bad my Fimo dried out, so I couldn't finish the other parts of the hill. Any suggestions how I could do it without Greenstuff or Fimo? aybe just sanding the whole thing could work too...
For a better understanding how this should look like in the end, I placed some models on the base (sneaky skaven-ratlings are everywhere!).
What do you think of it?
So long,
Paradox0n
A view on my workbench and gaming table: Terrain, Miniatures, Tutorials and Reviews
Showing posts with label Basing. Show all posts
Wednesday, May 22, 2013
Saturday, December 1, 2012
HowTo: A simple industrial base
While sitting around and experimenting with stuff, I got the idea to make a simple industrial base for games like Necromunda, Eden etc. As usual I tried to do this with stuff lying around and had in mind to do a tutorial if the result is somewhat OK.
As you read this, I must have thought it worthy to write about :)
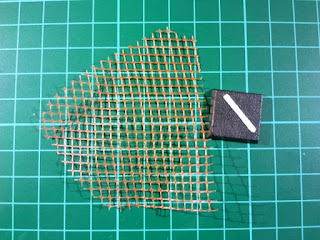
To be honest, this was the most tricky part of this experiment. At first I tried to cover the base in superglue and then just press the plastic net onto it. But since I have the "gel type" of superglue I think this didn't work out. Therefore I just used superthinned wooden glue to pin the net down and waited for it to dry completely
As you read this, I must have thought it worthy to write about :)
Putting some mesh on your base
Some plastic net and a base |
Sunday, November 25, 2012
WIP - Lava bases
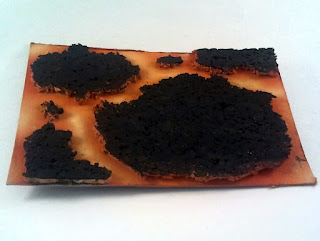
Finally having the time to try out my 0.2mm needle in my airbrush I did a quick test for the lava bases I plan to do for my Chaos Dwarf army. I cut out an appropriate piece of cardboard, glued some cork onto it and primed everything. Then I loaded the airbrush, beginning with red, mixing in more and more yellow and finally some white. Then (big error!) I painted the cork black.
Test for a lava base |
Since it was only a quick test for working with the 0,2mm needle and how much pressure I need for the different layers, it is OK. I now know how to do things for my Chaos Dwarves. First I have to use real bases or some MDF or some plastic card as base, then I'll have to prime everything black and drybrush the stones and THEN the airbrush comes into use. Think this will work much better.
And I'm really scared by the amount of work this will be *looks in fear to his Skaven, Dark Elves and Chaos Dwarves* :)
Labels:
Airbrush,
Basing,
Chaos Dwarves,
WIP
Thursday, July 26, 2012
Long time, no see - Distractions, Progress and Summer Flu
Hey girls and guys, sorry for being on the slow lane at the moment. First I had a day off and celebrated my birthday in the biggest funpark here. On top of that I had the last days a training course which was very interesting but really much information and input for my working life. Then my computer nearly crashed after buying ind installing a new graphic card and last but not least my wife and I cought a summer flu. Fever at now 30 - 34°C is not really funny.
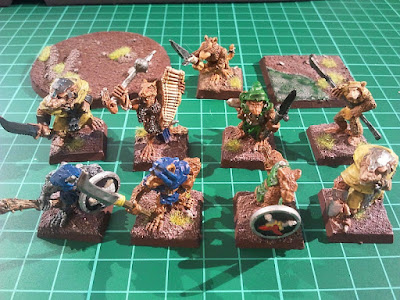
But nonetheless I made some small progress with my stuff. As stated in one of my last articles I want to rebase my old models from the nineties. While I was at this task, I also made me a base for my warp lightning cannon and a testbase for some unit filler or multibase. Its nothing special or fancy, I just wanted to show you some progress.
Rebased some old stuff |
Friday, July 6, 2012
Rebasing some of my old models
Perhaps you have seen some of my old models in my review of the Feldherr XL and wondered: What the *** are those ugly based miniatures. And you are propably right. But before you judge them I will tell you something about those poor Skaven :-)
Old Clanrats |
Sunday, May 6, 2012
Starquest Miniatures - Androids
As promised I started painting some of the Starquest miniatures. Since I am really out of painting and never used a airbrush I thought of using this miniatures for some experiments.The first miniatures I chose are the androids (very similiar to the Necrons of Warhammer 40k).
Androids of Starquest |
Tuesday, May 1, 2012
Basing experiments
Today is the "Tag der Arbeit" (roughly translated as "Labor Day") and while I am still waiting for my airbrush and my wife has to write for university, I tried some different basing stuff:
Overall I am very pleased with the outcome but need to experiment a little more. At the moment I can only say that pigments seem to give a more natural look than just washing the base.
- Using cork as basing material
- Using pigments for the first time
Corkbases with pigments |
Overall I am very pleased with the outcome but need to experiment a little more. At the moment I can only say that pigments seem to give a more natural look than just washing the base.
Labels:
Basing,
Experiment,
Pigments,
Stuff
Tuesday, April 17, 2012
Terrain made of aquarium decoration
Because we have two cats, we are pretty often in pet shops in our area. And since I re-started with the wargaming hobby, I always looked out for stuff to build cheap and easy terrain pieces with. Not long ago I found some big trees in the fish department and I took a closer look and instantly bought the piece.
I don't remeber the manufacturer or the store where I bought it, but it was around 4-5€ and is really tall (measures 10 cm in width and 11cm in height).
I just glued it on an old CD, sanded the base, drybrushed everything and gave a quick painting shot for the glowing warpstone. Et voilà, a warped tree is finished:
Sunday, April 15, 2012
Inspirational basing tutorials
By chance I found on Youtube the channel of Buypainted. As it seems they run a painting commision studio, but I found interesting that they have a whole bunch of great tutorial videos hosted on Youtube.
Apart from the standard "how do I paint model XYZ" I really liked the "how do I make themed bases" series. So I thought: "Why not share with everyone?". And here it is:
I hope you like them as I do.
Stay tuned and enjoy your time.
Apart from the standard "how do I paint model XYZ" I really liked the "how do I make themed bases" series. So I thought: "Why not share with everyone?". And here it is:
I hope you like them as I do.
Stay tuned and enjoy your time.
Labels:
Basing,
HowTo,
Inspiration,
Tutorial,
Video
Subscribe to:
Posts (Atom)
Related Posts
loading..