Showing posts with label Miniatures. Show all posts

Thursday, April 21, 2016

Experiment: Paint a miniature just by washing...

...and one drybrush for highlights.
So jep that is exactly what I wanted to do today. "Painting" a miniature with only washes and one drybrush step. Why? Because I did read quite a lot of fast painting tutorials who exactly did that for armies like Skaven, Goblins or Tyranids. And as you might know, I still have more than 200 Skaven uncounted numbers of Orcs & Goblins and much much more flying around.
Therefore I just wanted to give it a try. Another reason was, that I hadn't painted for half a year now and just wanted to get a feeling for paints again (and find my brushes, paints etc. pp. after the pimping of our office). Excuse the shabby pictures, I just made them with my smartphone to underline the "do as fast as possible" character of this test :)

The model is a custom made one, I don't even know anymore from which models the body and the arm was, I think from a Monk and a Beasthandler. MAybe I am wrong with that, I just grabbed me something in reach.

First step was priming the model with my trusted Vallejo Primer. I saw here some mold lines but really didn't care about them. The complete thing was more a test than wanting to achive some good results. And since tis is rank & file, noone will have a too close look. At least that is what I am hoping for :)

Then I washed it with Army Painter washes (which I reviewed some time ago). Green for the robe, Soft Tone for the fur, Dark Tone for the metal and Strong Tone for the rope and grip. A bit of Red for the tongue finished that step up.
After waiting some minutes to dry the miniature, I continued with washing, exactly the same order exactly the same tones, to strengthen the colors a bit. This time I checked that I put more color into the recesses.
One thing I did see now, is that the old GW Sepia Ink had a bit more orange/redish tone to it, the Soft Tone is much more brown.
After first wash
After second wash

As you can see the second layer of washes has a quite strong effect. I was really surprised.

I then saw, that the miniature lacked highlights which I couldn't change by just washing more. Thus I did "break the rules" and gave the miniature a fast drybrush with Vallejo Elfic Flesh. After that I gave it the third and last wash.
This time I broke up the washes a bit and mixed some blue into the Dark Tone and some Red into the Browns to introduce a bit of variation, e.g. for the metals and the tail
Then I glued it to a selfmade base and was done.


Is this the best paint job ever done? Well surely not! But it was super fast and had a surprising effect. With some short investment (doing the metals with metallic paint, putting some highlights) this could be ok as a rank & file.

Have to test a bit more with this heavy washing over just a primer. Up until now I only used washes for creating shadows, not for creating base colors.

Experiment succesfull! And I painted finally something!


So long,
Paradox0n

Saturday, September 5, 2015

Painted Abyssal Dwarf Mortars

There are really signs and wonders around. I finally painted up something! Seems like an eternity since I painted and thus it also feeled when I struggled with the paints and brushes again. One thing I recognized pretty fast: Next time I paint with a wet palette again. The whole time the paint just didn't feel right, especially since I paint now with longer bristle brushes (reason why, see here) which really struggle if the paint is too thick.
Nonetheless I painted and I will show you the results: An Abyssal Dwarf Angkor Heavy Mortar and an Abyssal Dwarf G’rog Light Mortar for my upcoming Kings of War army.

Nothing fancy or so, but since they got me back to painting I am really happy with them. The Heavy Mortar was quite a miscast sadly but I tried to do the best and cover that a bit with the paint. I think from a distance it is OK so far and that's what these two are about: Being painted for the battlefield :)


One thing I experienced through the process was that it seems that one of my Spray Primers got bad. It sprayed and everything but when it was dry, the paint didn't stick to it but dripped off of it. Like it had some strange Lotus Effect or something. Never had that before, but I was not happy with it before and now I think I just throw it away (12€ for the bin :( ).

Some more stuff is already on my table and I hope I find enough time and motivation to paint even more.


So long,
Paradox0n

P.S.: I think I will experience with showing WIP pictures and stuff also through Instagram and Twitter. Maybe that helps me to stay a bit more motivated. I hope that feedback turnaround is much faster there, because the comment section is mostly not used here :(

Sunday, April 5, 2015

Hordes: Reinforcements arrived

Doppelpost today! Okay so I still have my big package flying around with lots of fancy stuff I want to use in the future for my Legion of Everblight force.

In this picture you not only can see the All-in-One army box. But also the UAs (unit attachements) for my Ogryn Warspeers and my Strider Rangers. Also you can see two more Acolytes for the Spawning Vessel to make it a big unit, a Forsaken and a Swamp Gobber crew.
Plus there is the official template set.

Aaand I was running out of or missing washes. Especially a blue and a purple one is needed, so I opted for the Warpaints Inks because I heard lots of positive stuff from them. Let's see if they are really this good.

And I am still owing you some Warmachine/Hordes battle reports. But I had too much on my mind and nearly no motivation to really blog. If you follow me on the social medias you may have seen that I am still alive because I made some advertisement for the Wasteman kickstarter which was successfully funded this weekend. Very happy that someone can make his hobby to his work :)


So long,
Paradox0n

Sunday, February 1, 2015

Sunday evening WIP

Just a quick WIP shot from my painting table: My first Slasher from Shadows of Brimstone. I played a bit around with my airbrush and tested a bit of (pre)shading. In the end it was a bit too orange and I had to glaze it down.
As base I like it so far, have to think how I will continue with that one (thinking about either black claws or more natural ones pending to a nearly eggshell color). And yes there are some moldlines which I didn't see while prepping the miniature. But to be honest I just don't care anymore at this stage for a plain test/gaming miniature. That's why I also saved me from stuffing all the holes and stuff.

And I want to give a short shout-out to Quidam Corvus who once again gave a back link to me which gives me today some nice traffic and visitors :)


So long,
Paradox0n

Tuesday, January 20, 2015

Shadows of Brimstone: Hellbat

Just a short shot from my workbench: My first Hellbat from Shadows of Brimstone. I tried out a color scheme which I may use for my Legion of Everblight if they arrive finally. And I also tried out some wetblending (the tongue) just to get a feel for paint consistency and stuff. Must be improved but at least I did some painting again :)


More to the miniatures if I painted the complete batch of them.


So long,
Paradox0n


Saturday, November 1, 2014

Alan Wolfson exhibits in Lyon

© Alan Wolfson
If you happen to be near Lyon between the 16th of October and 15th of February you should think of visiting the Musée Cinéma et Miniature in Lyon (France) because Alan Wolfson exhibits some of his urban sculptures there.
You may ask now: Who the heck is Alan Wolfson? And the same I asked me when I saw the information in one of the forums I read... But after looking at his website and looking at some of his sculptures I just was flabbergasted by his work.

Maybe I can convince Mrs. Para to pay a visit to Lyon and this museum ;)


So long,
Paradox0n

Wednesday, October 29, 2014

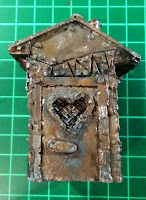
Ramshackle Drill finished

My Ramshackle Drill is finally finished (or as finished as I will go at the moment). I think it still needs some weathering, but I will most likely do that when the rest of the war machines are finished. The color scheme came out pretty nicely and I think I will do the rest of my Chaos Dwarfs in the same scheme.

The picture kills some of the highlights but I am too lazy to setup the bucket or even my photo tent for this one shot :) The cam of my mobile will not capture the details anyway. But for Christmas I want to gift me with a DSLR, most likely the Nikon D3300. Or does anyone have another good option in this price range?

And after my very successful post to my 200th "anniversary" it seems that my blog now jumps back to normal, few page views and comments :)

I hope I can get to some unboxing of the Shadows of Brimstone boxes. I already risked a look and so far they look fantastic.


So long,
Paradox0n

Saturday, December 28, 2013

WIP - Chaos Dwarf

Hope you all had a nice Christmas and didn't explode from all the delicious food you got :) Since here the weather is really bad (rain instead of snow and most of the time pretty windy) I couldn't prime my harpies (I have black as spray can primer) so I loaded up my airbrush and searched for a victim for my painting madness :)
But before starting to paint I had to pimp my working space since I got some really nice presents from the "Christkind" and additionally did some shopping in a big swedish furniture store. But more of that later.

Perhaps some of you remember that I had won a Scibor Chaos Dwarf some time ago. Since I have some days off at the moment I started painting this one. While basecoating two of my brushes died a miraculous death (the points just bended and the hairs feathered out) although I had always treated them well (even cleaned them with brush soap). But these where old ones so I don't have to mourn about them, I just switched to the more expensive ones

Nonetheless here are the first WIP shots from the chaos dwarf (I really have to adjust to my new painting setup especially for WIP pictures).
Everything seems a bit blotchy at the moment but the idea behind this massive brown basecoat is to give my bronze a nice base. And on black/white or pure grey the color just doesn't "shine" enough.
The fur I want do shade down a bit and give it some drybrushing and the coat should be a dark red. The washing didn't tune it down enough, so I think I will start shading it manually.

Before starting to basecoat the armor in brown, I did a short test with the shield of this chaos dwarf. And I really really liked the result. It was just a basecoat in brown, one layer of Vallejo Glorious Gold, a heavy wash of Gryphone Sepia, some highlights with a  mixture of the gold and Vallejo Gunmetal Metal, a final highlight with nearly pure Gunmetal and a final wash with sepia.

For me this gave exactly the look of a used but well-kept shield I wanted.

Stay tuned for more WIP of him. I really like the details of this miniature and are happy that I got it from Mr. Lee (even if I had some nightmares while preparing it for painting).


So long,
Paradox0n

Friday, October 4, 2013

Review: Painting Buddha - Season 1.1:Target Identified | Tale of two painters

Alllriiiiight!!! So we start directly with an insider you will understand if you have watched the first three DVDs with Ben Komets :) After watching the 6 DVDs I was completely smashed and to be honest: I had some difficulties to find a way how to describe this set and writing a review about it. Not because it is bad, on the opposite, but because it has many different things to see AND you have two different painters who have a somewhat different approach to painting those two wonderful miniatures I already wrote about.

So where to start? Perhaps some general stuff first...
The set is completely in English with subtitles in English, German and Spanish. You get a DVD set from two painters with pretty different approaches how to paint exactly the same miniatures. Ben does everything "by hand" where Rafael starts with using an airbrush.

Painting Buddha - Season 1.1 | The menu
The menus are in English and describe the parts which are painted of the miniature (not the techniques though).
Both painters are setup straight in front of the camera and Zaphod does some Q&A while they are painting. These comments from the OFF are sometimes pretty funny e.d. that is where the ALRIIIIIIGHT!!! comes from :) Maybe here is some space to optimize so that the painters are watching a bit more into the camera and not to the side where Zaphod and/or the self-monitor is placed. Telepromter effect you know? And one odd thing I noticed: The aspect ratio of the filmed material seems to be a bit off on my TV. Some parts of the screen is cut off, I tried to fix it with on-board possibilities of my TV but nothing worked. On my PC everything works fine.

Monday, August 19, 2013

WIP - Ramshackle Games Dunny

WIP - Ramshackle Games Dunny
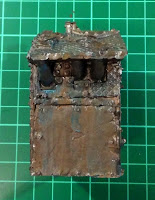
Some fast WIP shots from the Dunny. As said I am experimenting with the weathering a bit. So far the Dunny is primed, base colored with some dark metal paint, washed with Vallejo Smokey Ink, with some selfmade wash from Vallejo Halcon Turquoise and with a selfmade wash from different pigments.
I think I will try some more pigmenting perhaps in a mixture of glue, baking soda and pigments to get the rough rust feeling. And some painted on pigments without any solvent.

At the end I will drybrush the whole thing to get a more metallic look back. And weather it again a bit down, depending on the overall result. I know it doesn't look very clean but I want a rusted look as far as I can get it :)

[UPDATE]
Just realised that something weird happened while uploading the pictures. Therefore I adjusted the post a bit.

So long,
Paradox0n

Friday, August 16, 2013

Review: Ramshackle Games - Dunny & Drill

Ramshackle Games
Today Labschi brought me a small package from Ramshackle Games, some late birthday presents which took some time before they finally arrived in Germany. It contained the "Dunny" and the "Boring Machine". The two pieces were pretty good protected with thick layers of air cushion foil. Therefore everything was undamaged and ready to be prepared and reviewed.
The resin is somewhat heavy (much heavier than I thought) and had a really bad smell on it. On touch you could feel the thin film of abherent which had a somewhat slimy feel on it. But after cleaning it with some dish soap both the slimy feeling and the smell was completely gone.

Sunday, August 11, 2013

Painting Buddha - Season 1.1:Target Identified | The Miniatures

Metal box containing the Miniatures The Painting Buddha seal
After unboxing the Season 1.1:Target Identified set and having all the stuff lying around I decided to split my review into different parts because it really would be too much text for only one post. Additionally the box contains of 6 DVDs with two different approaches to painting the miniatures (and the base) so I will cover them later after I watched them completely and have a better and more general opinion of all the stuff (my first impression is a very good one). The miniatures are delivered in a small metal box with the Painting Buddha logo which is sealed with a sweet, little sticker. As already said, these small details give me the feeling that there are people at work who love(d) what they are doing. At this point of writing I notice that I completely forgot to take a picture of the miniatures inside the opened box, but you can see it on the overview picture in my first glance post if you want.

Sunday, July 29, 2012

Descent - Journeys in the Dark | Miniatures

As promised I made today some pictures of the miniatures of the boardgame Descent - Journeys in the Dark which I reviewed not long ago. Since there are so many miniatures I didn't set up my photobucket I just arranged them on my cutting mat and did some short photo shooting. If you want any of the miniatures in close up, please state so in the comments, I will then do a in deep coverage of them.

I'll be starting with the different sets of heroes. I tried to make some closeups but my camera played me some tricks, therefore only a group photo:

All of the heroes for Descent

Related Posts