Showing posts with label Terrain. Show all posts

Wednesday, October 14, 2015

Terrain from spare parts: Building a dead tree

Today I want to continue with my articles about how you can make terrain out of chunk or spare parts. This time I will show you, how you can make a dead tree (the one you can see on the left side) completely from chunk.

What you will need for this:
- Paper towel
- A twig or dried flower stem
- Something for a base (e.g. a washer)
- Glue
- Sand/Earth
- Static grass/flock (completely optional)

Twigs
Paper towel

Saturday, August 15, 2015

Review: WarMage MDF bases - Part I

Yesterday the postman brought me a small package which surprised me because I didn't expect one. As he gave me the package with the comment: "This is no package, this is a letter" i was really curious what is in there. But as soon as I opened it and smelled the odor of burnt wood, I did know immediately what awaited me there :)

So today I will show you the MDF leaflets from WarMage, a German company which somehow specialized in lasercut MDF pieces. I first saw the stuff on Brückenkopf and as it was not added to the shop after a week I got into contact with them. I got a very fast reply on my questions and Nils (the owner) seemed to be a nice guy. And since there was not only the small base version but also two other ones (as he told me, the salesman he seems to be), I opted for a bigger version, containing 3 leaflets and having place for roughly 31 pieces of  trees and rocks.

For me it is the first time that I have some lasercut stuff though I have already some experience with MDF pieces :) So I will describe my impressions I got from the product from here on.

The leaflets are bigger than a DIN A4 paper and the cuttings are very clean and as far as I have seen precise. There are no leftovers in the cuts, therefore the pieces are secured with crepe tape to hold everything in place.

The MDF is ~3mm thick and therefore sturdy enough for even the roughest gameplay. If you count in that the design is a layered one, where you have a base and glue on a second layer with the slots for your trees, that should be more than enough.

As you can see in the pictures, there are 3 types of bases and with my chosen package you can build: 
- 2 times a big 5 slot base with 40mm slots
- 3 times a small 3 slot base with 40mm slots
- 4 times a small 3 slot base with 2x40mm and 1x30mm slot

I primarily bought the stuff for creating some nicer and more flexible wood pieces, but it looks as if I can play around a bit and do also some rough terrain with rocks or something completely different (since I only have 9 ugly old trees).
But that will be something for another part :)

Hope you liked the first impression.


So long,
Paradox0n

Disclaimer: This post is not sponsored by WarMage in any kind, I bought the stuff myself, it was not given to me for a review.
Thursday, March 12, 2015

Hobby Magazines: Irregular Magazine back again!

Irregular Magazine No.1 Vol.2
Seems like the hobby magazines stream doesn't stop at the moment. Today I can tell you that an old acquaintance returned: Irregular Magazine. After more than 2 years the just published their first issue of the so called Volume 2 of the magazine. Really cool if you ask me.

The contents of this issue are the following:
  • Editor's Challenge: Army on the Cheap
  • Strange Aeons - A Short Story
  • Salute to Marc Miller
  • Star Destroyer Scratch Build
  • DnD 5th: Rise of Tiamat
  • Creating Alien Landscapes

The article about the scratch build Star Destroyer is really really awesome and the Alien Landscape tutorial shows with which unbelievable stuff we can build terrain.

If you haven't done it yet, go risk a look. It is free and they desire every support for a good relaunch.


So long,
Paradox0n

Sunday, November 9, 2014

Playing around on Sunday morning

Just a short update on early Sunday morning. I am just testing (fooling?) around with my new camera a bit. And I wanted to quickly show you some of the pictures I shot (and had an IMO nice effect by chance). After posting that I will return to priming the first miniatures from Shadows of Brimstone but I had to take a break because it really stressed me out that my airbrush was totally clogged  although I gave it a thorough cleaning after the latest usage. Nearly killed my motivation to continue at all....

Sunday, October 27, 2013

Papercut - Small house

Papercut house from 5th edition starterbox - Front Papercut house from 5th edition starterbox - Back
Since my Photobucket is too small I just had to shoot this one on my cutting mat. Therefore the green background. As the posted Shack a while ago, this is the papercut house from the 5th edition starterbox from Warhammer Fantasy.

As the shack this was just glued on a cardboard base, flocked with static grass and the folding lines where painted in the corresponding colors. Again nothing fancy but it does its job pretty good (and this since the late 90ies). This is why the base is slightly warped, I think this thingy was based in the late 90ies and saw lots of games in this time :)

So long,
Paradox0n

P.S.: Again a new passenger on board! Welcome Peter, your blog already is in my blogroll and thanks for commenting :)

Wednesday, August 21, 2013

Papercut - Shack

Papercut shack: Front Papercut shack: Back
Just a short update on my papercut section. Perhaps you have seen this terrain piece already in my battle reports. But I just wanted to upload some close ups. This is the small shack which was included in the 5th edition starterbox for Warhammer Fantasy. So yes, pretty old this thing and pretty much documents my hobby career. This was the second starterbox our playing group bought and I think I have the box somehwere flying around :)
This is really nothing fancy, I just glued it onto a base and painted the edges in the appropriate color to mask the white cardboard. Back then we only worked with thick cardboard for bases but as you can see they warp over time. I won't re-base it because I fear that I will destroy the shack itself while doing it.

Enlightenment of the day: I need a bigger photobox, my photobucket is too small for bigger pieces. Otherwise I would have completed the post with the corresponding house. So that will be something for another post.


So long,
Paradox0n

Monday, August 19, 2013

WIP - Ramshackle Games Dunny

WIP - Ramshackle Games Dunny
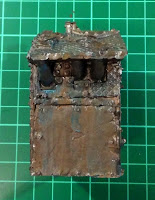
Some fast WIP shots from the Dunny. As said I am experimenting with the weathering a bit. So far the Dunny is primed, base colored with some dark metal paint, washed with Vallejo Smokey Ink, with some selfmade wash from Vallejo Halcon Turquoise and with a selfmade wash from different pigments.
I think I will try some more pigmenting perhaps in a mixture of glue, baking soda and pigments to get the rough rust feeling. And some painted on pigments without any solvent.

At the end I will drybrush the whole thing to get a more metallic look back. And weather it again a bit down, depending on the overall result. I know it doesn't look very clean but I want a rusted look as far as I can get it :)

[UPDATE]
Just realised that something weird happened while uploading the pictures. Therefore I adjusted the post a bit.

So long,
Paradox0n

Friday, August 16, 2013

Review: Ramshackle Games - Dunny & Drill

Ramshackle Games
Today Labschi brought me a small package from Ramshackle Games, some late birthday presents which took some time before they finally arrived in Germany. It contained the "Dunny" and the "Boring Machine". The two pieces were pretty good protected with thick layers of air cushion foil. Therefore everything was undamaged and ready to be prepared and reviewed.
The resin is somewhat heavy (much heavier than I thought) and had a really bad smell on it. On touch you could feel the thin film of abherent which had a somewhat slimy feel on it. But after cleaning it with some dish soap both the slimy feeling and the smell was completely gone.

Saturday, August 11, 2012

HowTo: Building a tower - Part 4

The roof, the roof, the roof is on fire. I thought a while about the roof I want to build for my tower: Just a flat one with battlements or a pointy one with roofy shingles? Since I already invested so much time I decided to make the pointy one. So start the video and read the rest of this article :)


Sunday, July 15, 2012

HowTo: Building a tower - Part 3

After building and painting the core for my tower, it is time to build the upper level of it. Somewhere the guards or other inhabitants must live.

First I built a core of styrofoam which diamater was a little bigger than the stone structure. Then I glued everything on the top of my stoneworks and let everything really dry. Meanwhile I sorted and cut my wooden "swizzle sticks" into the same length. You need more than you think, I had to borough some of my friend. Lucky enough you get them for free in every fast food restaurant. I used some clippers. The edges don't need to be plain and exact.

Cutting everything to length

Monday, July 9, 2012

HowTo: Modular Gaming Table - Part 4

Ok, we already went through a lot of steps. First we prepared the six basic modules and shaped some with hills and then we started coating everything with our structure paint. Now it's time to adding detail to the whole thing. This part is again not really magical, but you should take care in this process. The most importan thing is that every module must be completely (!!!) dry. We had a kind of "oven" on my balcony on which the modules could dry for a complete summer day.

Dried modules
Drying station for our modules

Thursday, June 28, 2012

HowTo: Modular Gaming Table - Part 3

It's terrain thursday (nah just kidding, atm I am in the mood to do so) so I will post another part of my modular gaming table series. After preparing the six basic modules and shaping some with hills it is time to get dirty and put some paint onto our modules. Therefore we mix our own structure paint (the paste/paints you can buy are WAY too expensive). Besides a big bucket (~5l bucket is big enough) we need:

Bucket of PVA/white glue:

Approx. cost:  ~ 8 Euro

Bag of bird grit:

Approx. cost: ~ 90ct

Bottle of brown paint:

Approx. cost: ~ 5 Euro

Pour everything together, in the end we used a mixing ratio of about 1:1:1:1 (water, paint, sand, glue). Just try it out what suits you best. The structure paint should not be too runny and should not be as thick as toothpaste. You should be able to spread it out easily without the paint beeing transparent or only gluing sand...

Applying the structure paint 

Tuesday, June 19, 2012

HowTo: Building a tower - Part 2

Ok, after showing you how I build the foundation for my tower, now it's time to paint the stone carvings. This will be only a short part, because I think I can't show you some wicked magic here, it's just good old handywork.

After the core was build together I primed everything black. At this stage I didn't have my airbrush yet so I was forced to do everything by hand.I used some cheap black color from the hardware store to cut down the expenses. After three layers everything was completely black. The three coates of paint had one side effect I noticed when everything was dry: The carving was much more stable than before.

Primed everything black

Tuesday, June 12, 2012

HowTo: Modular Gaming Table - Part 2

In the last part of this HowTo series, I explained how I build the base for the gaming modules. In this part I will describe how the hills were made and how I prepared the board to get the first layer of the structure paint.

I suggest you listen to this song while reading the next part:


Saturday, June 9, 2012

[Updated] Another warped tree

I couldn't resist to buy another aquarium decoration tree. After I had some nice results with my first one, I found another one in my hardware store. And with a price of ~3 euros it was again difficult to do something wrong by buing it.
They really fit into my warped, beaten up ad dark concept for my gaming table. And I play Skaven so warpstone trees are even better!

No long chit chat, just a short shot from my photo bucket:


Tree from the front
Tree from the back

Thursday, June 7, 2012

Baking time

Today I took advantage of the beautiful weather outside and went to a walk with my wife. We both looked out for our collectibles: She for herbs and plants like elder flower or wild strawberries and I myself for basing materials. I was very lucky to find an uprooted tree from which I could scrap of some bark. Therefore it's baking time!

Baking the bark

Wednesday, June 6, 2012

HowTo: Building a tower - Part 1

Again I'm keeping one of my promises, I start the second planned series of my HowTo's. Today I will talk about building a  tower from scratch.
As you have seen in my other HowTo's I like building terrain pieces from spare parts or even garbage. But in this case all my thoughts about how I could achieve a decent result failed. Therefore I started planning a complete building from scratch. Thanks to some research and one REALLY good tutorial from Gidian Gelände, the concept grew fast. So I collected the needed material and started to experiment with things I had never done before (again).

Chips and Selitron

Saturday, June 2, 2012

HowTo: Modular Gaming Table - Part 1

As promised I will do a HowTo-series about how I build my gaming table. The gaming table was build last year, toghether with a close friend of mine and has seen now three battles (one you can in my first battle report). We had enough of playing on a normal dining table. The Citadel board was too expensive for us (since we only play on an irregular base) so we researched a bit and planned our own modular board.
Modular because:
  • we wanted a table which looked different when we wanted to
  • I have not enough room to store one or three big plates
  • and we wanted to save some money :)
So we made a masterplan and went shopping in the local hardware store. After the first tour we replanned everything because we didn't want to spent as much money for material as we would have to pay for the Citadel board... Therefore I will do a Step by Step how the boaard was really build and will give an overview how much the material had roughly cost.

Tuesday, May 29, 2012

Terrain out of junk - Impassable terrain

Again an article about something I made up to create terrain out of junk. We had our fruit basket full of exotic fruit and to our misfortune some of the passion fruits were really dried up and not ready to eat anymore. They were so hard, I think I would be able to throw in a window with them... But no, building terrain with them is much more fun. They have a real alien look so you could use them as tyranid spores or as some warped stones from the chaos desert or dragon eggs or something like this. Decide yourself ;)
 
Impassable Terrain
Dragon Eggs? Warpstone? Tyranid Spores?

Friday, April 27, 2012

Terrain from spare parts - Part 2: Stack of wood

Seems terrain from spare parts really gets a series on my blog. Part 2 contains another terrain piece made completly out of stuff I had on my workingtable and from junk I would have thrown away otherwise . Its nothing fancy or even big, but it fits nicely to my growing village ;) A small stack of wood:

Stack of wood

Related Posts